
Northern Garlic Rhythm
Seasonal Steps That Matter
Scroll to learn the real cadence of garlic in Northern gardens.
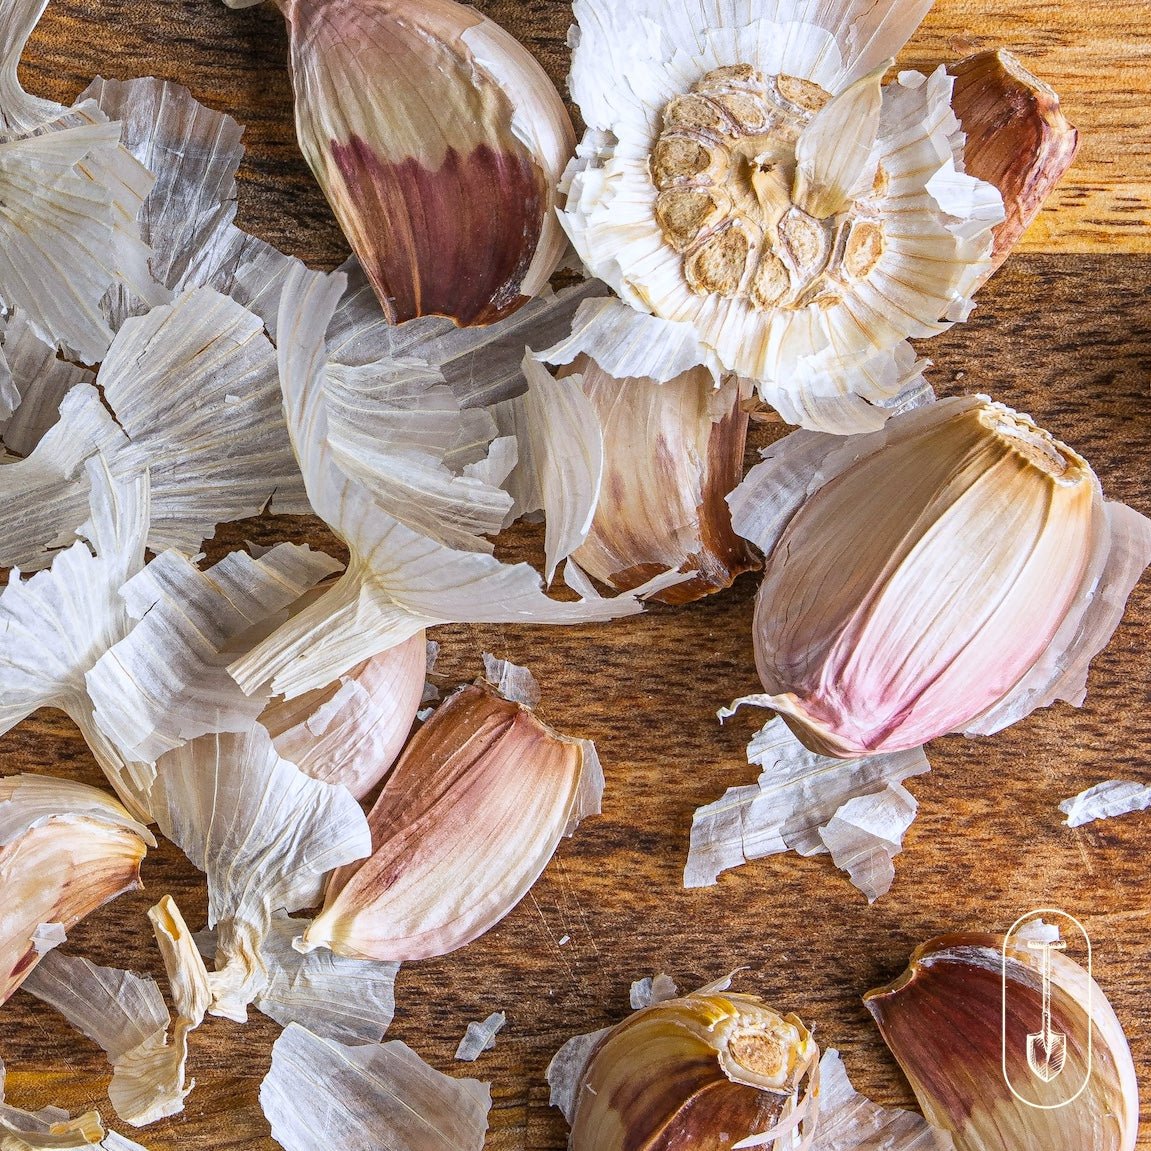
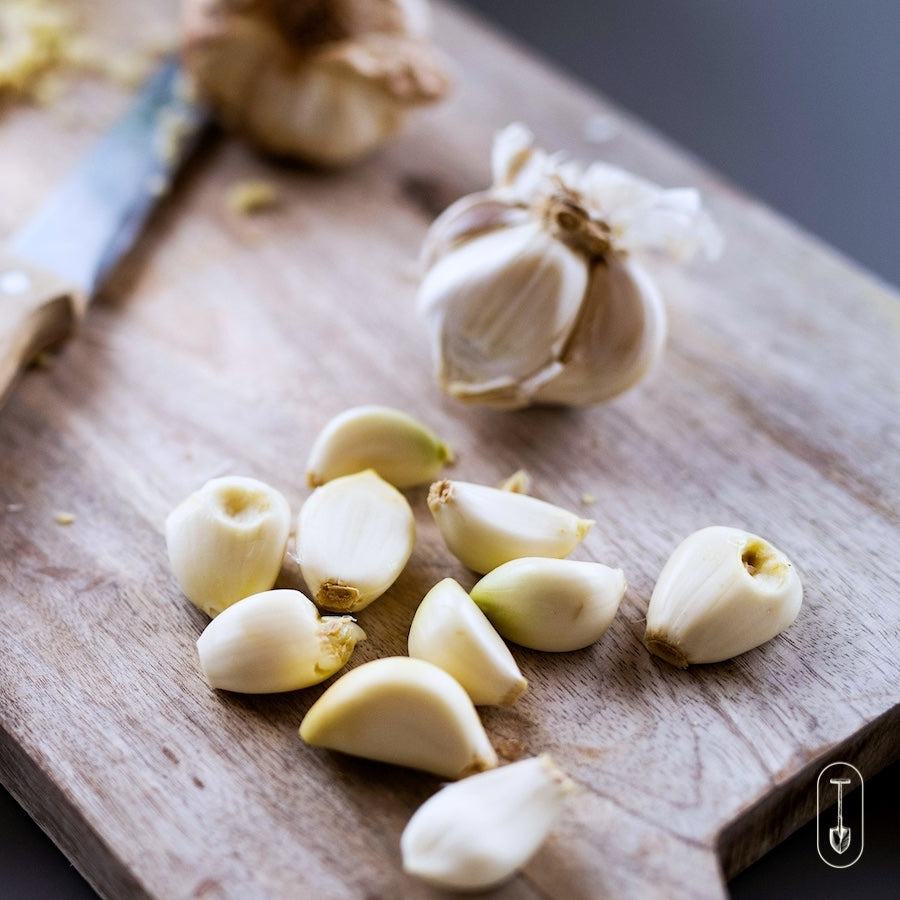
1. Plant in Fall, Before the Ground Freezes
Garlic is planted in autumn
Aim for planting 2–3 weeks before the soil freezes solid, usually late September through October, depending on your region.
How to plant:
- Break bulbs into individual cloves just before planting.
- Choose the largest, healthiest cloves for strongest bulbs next year.
- Plant 2–3 inches deep (measured from the top of the clove).
- Space 4–6 inches apart in rows 8–12 inches apart.
- Plant with the pointed tip facing up.
- Firm soil gently. Water if dry.
Cover with 4-6" straw or dried leaves
Garlic doesn’t need to sprout tall before winter. It needs to root.
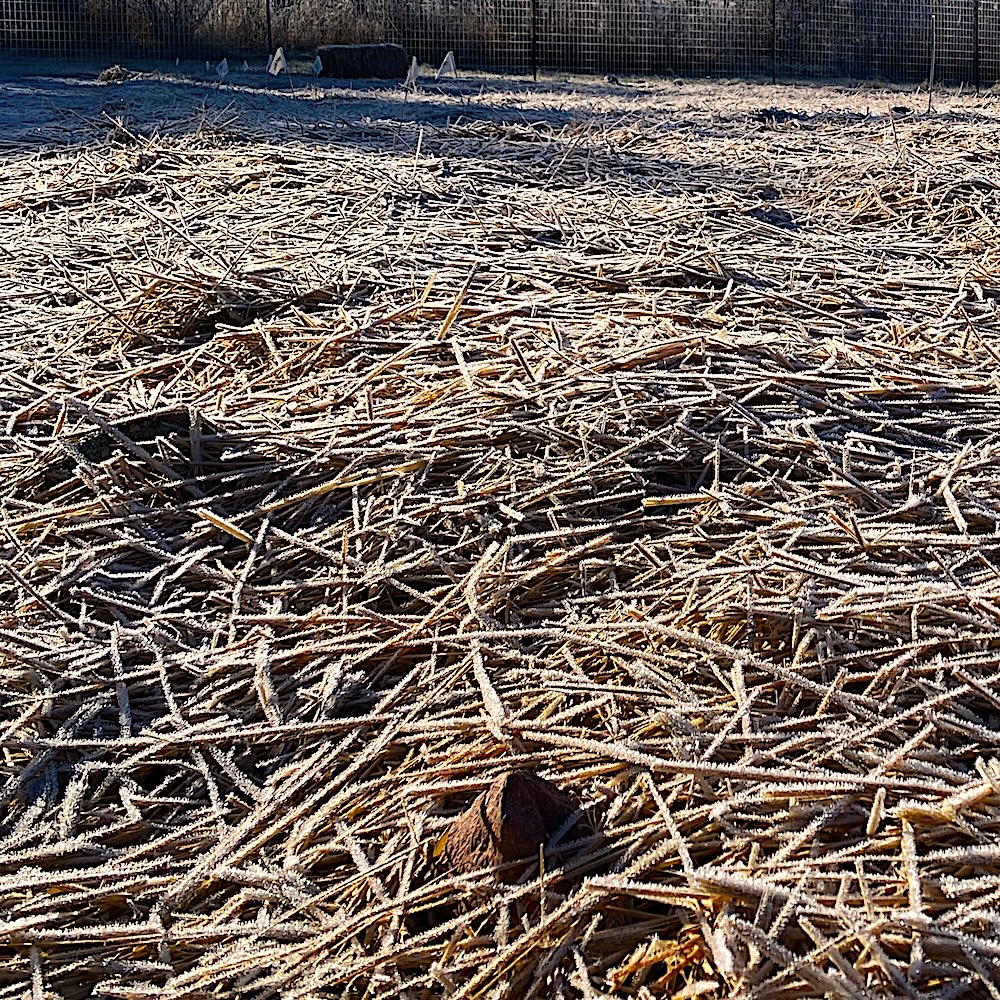
2. Winter Rest, Cold Is Part of the Process
Northern winters aren’t a problem for garlic. They’re part of its development.
After planting:
- Mulch with 4-6 inches of clean straw or chopped leaves.
- Mulch moderates soil temperature and prevents freeze-thaw heaving.
- Leave it alone.
Garlic requires cold exposure to properly form bulbs. This natural chilling period (vernalization) is what triggers strong head formation in spring.
Snow is insulation. Let it work.
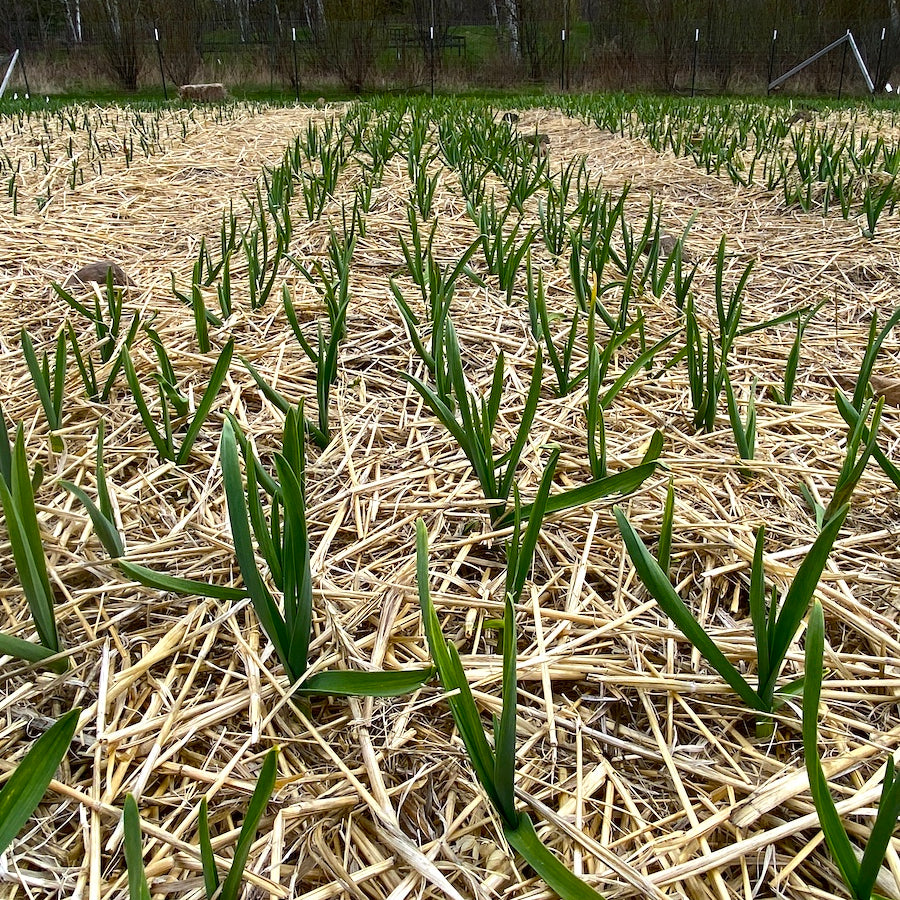
3. Spring Growth, Feed the Roots, Not the Leaves
As snow melts, you’ll see green shoots early, often before most other crops wake up.
In early spring:
- Gently pull back mulch if it’s thick or matted.
- Apply nitrogen-rich fertilizer once growth begins.
- Keep soil consistently moist but not waterlogged.
Garlic prefers:
- Full sun
- Well-drained soil
- Steady moisture through early summer
Strong early growth sets the stage for large bulbs later.
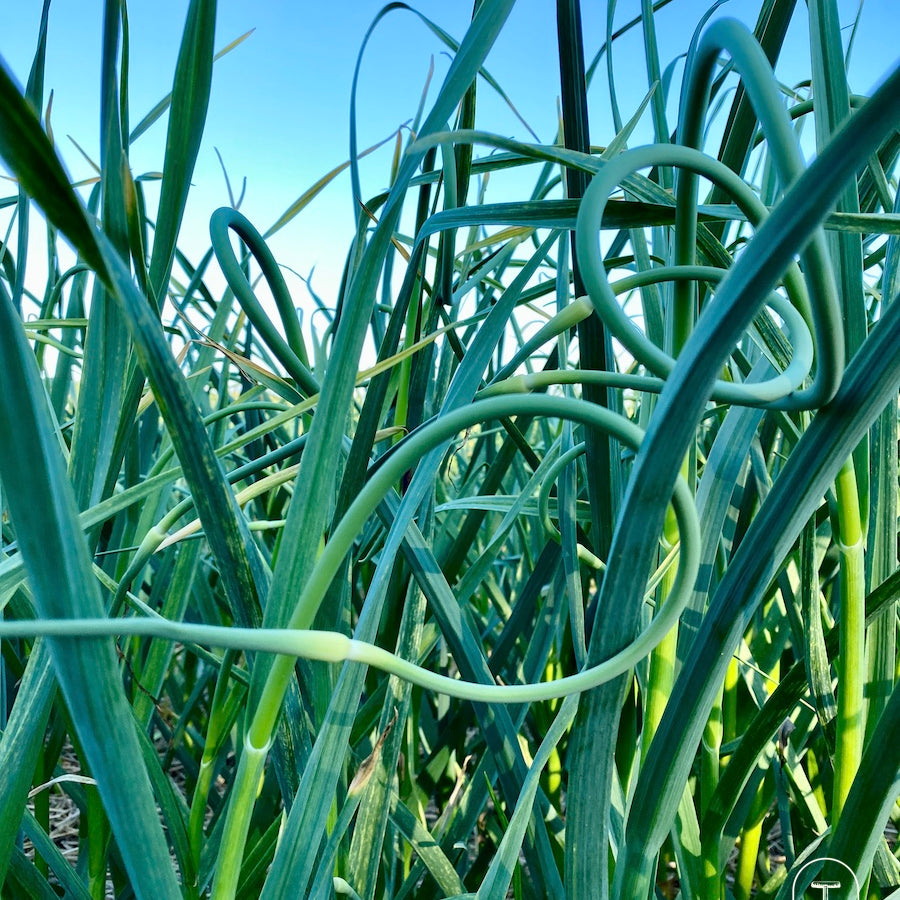
4. Bulb Formation, Remove Scapes, Stay Consistent
In hardneck varieties, a curly flower stalk called a scape will emerge in late spring.
When scapes curl:
- Snap or cut them off.
- This redirects energy back into bulb development.
- (Bonus: scapes are edible, mild and garlicky.)
Continue watering through early summer.
As lower leaves begin to yellow, reduce watering. This signals the bulb is nearing maturity.

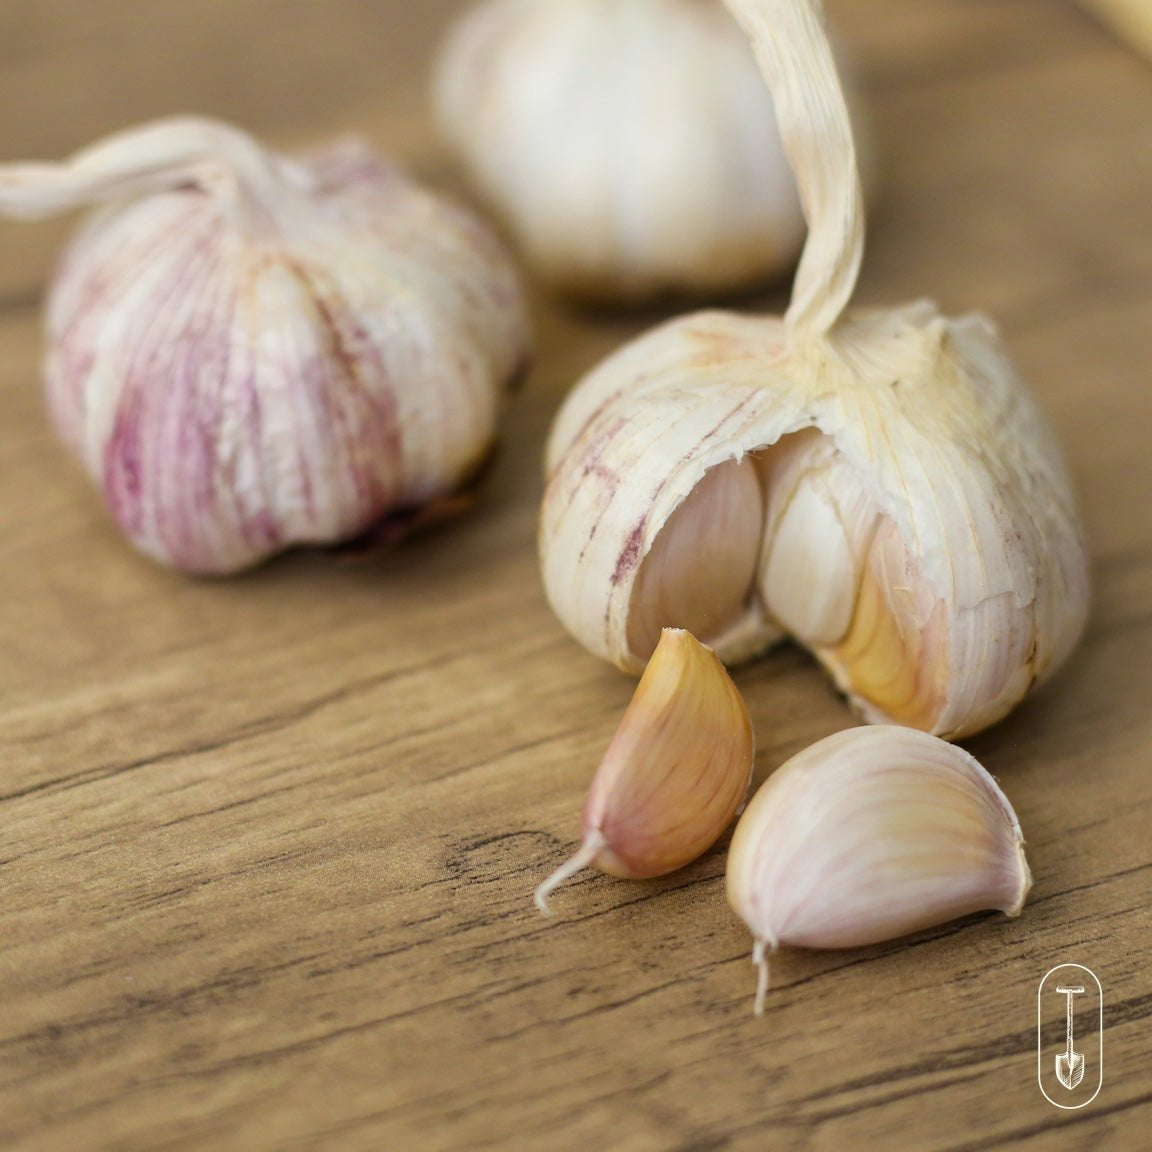
5. Harvest & Cure, Don’t Rush This Step
Harvest typically happens mid to late summer.
Garlic is ready when:
- The bottom 2–3 leaves have dried
- Upper leaves are still partially green
To harvest:
- Loosen soil gently with a pitch fork.
- Lift bulbs carefully, do not pull by stems.
- Shake off excess soil (don’t wash).
Curing is critical:
- Lay garlic in a single layer in a dry, shaded, well-ventilated space.
- Cure for 2–3 weeks.
- Trim roots and tops after curing.
Properly cured garlic stores for months and becomes strong seed for the next planting cycle.
6. Storing Garlic for Planting or Long-Term Use
Proper storage protects flavor, viability, and future planting strength.
After curing, store garlic in a cool, dry, well-ventilated area. Good air circulation is essential.
Avoid:
• Sealed containers
• Plastic bags
• Refrigerators
• Closed cabinets or closets with stagnant air
Garlic needs to breathe.
Ideal storage conditions:
• 50–60°F if possible
• Low humidity
• Indirect light
• Open mesh bags, slatted crates, or shallow baskets
When stored well, garlic will hold for months, whether you’re cooking with it or saving the best heads for fall planting.
Strong storage protects strong seed.
1. Plant in Fall, Before the Ground Freezes
Garlic is planted in autumn
Aim for planting 2–3 weeks before the soil freezes solid, usually late September through October, depending on your region.
How to plant:
- Break bulbs into individual cloves just before planting.
- Choose the largest, healthiest cloves for strongest bulbs next year.
- Plant 2–3 inches deep (measured from the top of the clove).
- Space 4–6 inches apart in rows 8–12 inches apart.
- Plant with the pointed tip facing up.
- Firm soil gently. Water if dry.
Cover with 4-6" straw or dried leaves
Garlic doesn’t need to sprout tall before winter. It needs to root.
2. Winter Rest, Cold Is Part of the Process
Northern winters aren’t a problem for garlic. They’re part of its development.
After planting:
- Mulch with 4-6 inches of clean straw or chopped leaves.
- Mulch moderates soil temperature and prevents freeze-thaw heaving.
- Leave it alone.
Garlic requires cold exposure to properly form bulbs. This natural chilling period (vernalization) is what triggers strong head formation in spring.
Snow is insulation. Let it work.
3. Spring Growth, Feed the Roots, Not the Leaves
As snow melts, you’ll see green shoots early, often before most other crops wake up.
In early spring:
- Gently pull back mulch if it’s thick or matted.
- Apply nitrogen-rich fertilizer once growth begins.
- Keep soil consistently moist but not waterlogged.
Garlic prefers:
- Full sun
- Well-drained soil
- Steady moisture through early summer
Strong early growth sets the stage for large bulbs later.
4. Bulb Formation, Remove Scapes, Stay Consistent
In hardneck varieties, a curly flower stalk called a scape will emerge in late spring.
When scapes curl:
- Snap or cut them off.
- This redirects energy back into bulb development.
- (Bonus: scapes are edible, mild and garlicky.)
Continue watering through early summer.
As lower leaves begin to yellow, reduce watering. This signals the bulb is nearing maturity.
5. Harvest & Cure, Don’t Rush This Step
Harvest typically happens mid to late summer.
Garlic is ready when:
- The bottom 2–3 leaves have dried
- Upper leaves are still partially green
To harvest:
- Loosen soil gently with a pitch fork.
- Lift bulbs carefully, do not pull by stems.
- Shake off excess soil (don’t wash).
Curing is critical:
- Lay garlic in a single layer in a dry, shaded, well-ventilated space.
- Cure for 2–3 weeks.
- Trim roots and tops after curing.
Properly cured garlic stores for months and becomes strong seed for the next planting cycle.
6. Storing Garlic for Planting or Long-Term Use
Proper storage protects flavor, viability, and future planting strength.
After curing, store garlic in a cool, dry, well-ventilated area. Good air circulation is essential.
Avoid:
• Sealed containers
• Plastic bags
• Refrigerators
• Closed cabinets or closets with stagnant air
Garlic needs to breathe.
Ideal storage conditions:
• 50–60°F if possible
• Low humidity
• Indirect light
• Open mesh bags, slatted crates, or shallow baskets
When stored well, garlic will hold for months, whether you’re cooking with it or saving the best heads for fall planting.
Strong storage protects strong seed.
Garlic FAQ's
Is this garlic for planting or eating?
This garlic is sold as seed garlic for planting. It’s certified organic, field-grown in Zone 3-4, and carefully cured to ensure strong storage and viability. While it’s perfectly safe to eat, these bulbs are selected and sized for gardeners and growers.
When should I plant garlic?
We plant when nighttime lows consistently hover around 40-45°F.
That’s our simple rule of thumb.
At that point, the soil has cooled enough to encourage strong root development, but it’s not so warm that garlic pushes up green growth before winter. Garlic needs roots before snow, not tall shoots.
Soil temperature is technically what matters most. But watching nighttime lows is an easy, reliable way to hit the sweet spot without overcomplicating it.
In Zones 3-4, that usually means:
• Late September through October
• Cool nights in the 40s
• Daytime highs in the 50s
Plant before the ground freezes solid, but after summer warmth has passed.
Garlic doesn’t need heat. It needs cool soil and time to settle in.
How much should I order?
½ lb plants approx. a 24″ × 36″ bed
1 lb covers roughly 36″ × 48″
We recommend 4″ spacing between cloves and planting in full sun with good drainage. A typical ½ lb yields around 20–30 cloves, depending on the variety.
How will my garlic be shipped?
Garlic ordering will open in 2027. Garlic ships via USPS Priority Mail starting mid September. Each order is packed by hand in labeled, breathable bags. You’ll receive a tracking email when your order ships.
Be sure to open immediately and remove from the box and packaging.
Can I pick up my garlic order?
Local pickup is not available. Because garlic is harvested and cured over several weeks, we’re unable to schedule exact pickup dates. And as the fall season ramps up, our crew shifts into essential fieldwork with a leaner team.
Do you guarantee garlic performance?
We take care to ship healthy, viable seed garlic, but because growing conditions vary widely, we cannot guarantee crop results. If there’s an issue with your order on arrival, contact us within 7 days so we can make it right.
Remove garlic immediately from packing. Never keep garlic in an enclosed space, such as a cabinet or closet. It needs to be stored cool and dry space.
How do I prepare my garlic bed?
Choose a sunny, well-drained location and remove any weeds. Garlic prefers loose, fertile soil with good tilth; think crumbly, not compacted. If your soil is heavy clay, work in plenty of well-aged compost and peat to improve structure and drainage. Raised beds or broad ridges can also help prevent waterlogging.
Aim for soil that’s moist, aerated, and rich in organic matter, not soggy or tight.
How do I plant garlic and should I mulch?
Separate the cloves just before planting, keeping the papery skins intact (its okay if the skin falls off). Plant each clove 2 inches deep, root side down, with 4–6 inches between cloves and 8–10 inches between rows.
After planting, water well and mulch heavily; 4–6 inches of straw, shredded leaves, or grass-free hay. Mulching insulates the soil, suppresses weeds, and prevents frost heaving in cold northern zones.
Pro tip: Lighten or fluff the mulch in the spring to make it easier for garlic to push through, then put back on after sprouting.
Can I plant garlic in a raised bed or should it go directly in the ground?
You can absolutely plant garlic in raised beds, as many gardeners prefer them.
Raised beds warm faster in spring and drain well, both helpful for garlic. The key is soil depth. Make sure there are at least 6–8 inches of soil below the clove so roots can develop fully and stay insulated through winter.
When planting in raised beds:
• Keep cloves about 6 inches in from the edges of the bed.
(Edges dry out and freeze more quickly.)
• Mulch well with 3–4 inches of straw or chopped leaves. This helps regulate winter temperature and moisture.
If you have an in-ground spot with full sun and good drainage, that works beautifully too. Garlic isn’t fussy. It simply needs room to grow and a good winter blanket of mulch.
Seed Collections Built for Zones 3 & 4
If your winters bite and your growing season blinks, you’re in the right place.
These collections are curated, tested, and built for short seasons, from backyard beds to full homesteads.


From Montana to Maine, from the Dakotas to the Adirondacks, these collections are tailored for gardeners like you.
Grow where you are. Grow with confidence.